Ignite Your Creativity: Master The Art Of Campfire Drawing
Table of Contents
- The Allure of a Campfire Drawing: More Than Just Flames
- Mastering the Basics: Your First Campfire Drawing Steps
- Igniting the Canvas: Drawing Realistic Flames and Embers
- The Art of Light and Shadow: Bringing Your Campfire to Life
- Beyond the Blaze: Enhancing Your Campfire Scene
- Digital Campfires: Vector and PNG Resources
- Nurturing Creativity: Campfire Drawing for All Ages
- Frequently Asked Questions About Campfire Drawing
The Allure of a Campfire Drawing: More Than Just Flames
A campfire isn't just a pile of burning wood; it's a symbol of gathering, warmth, adventure, and connection. This inherent charm is precisely why a **campfire drawing** resonates so deeply with viewers. When you embark on a campfire drawing project, you're not merely depicting an object; you're attempting to capture an atmosphere, an emotion. Think about the memories associated with campfires: stories told under the stars, the taste of roasted marshmallows, the comforting glow against the dark night. These are the feelings you want to evoke in your artwork. The beauty of drawing a campfire lies in its dynamic nature. No two fires ever look the same, offering endless possibilities for creative expression. This freedom allows artists to infuse their unique style into each piece, making every **campfire drawing** a personal interpretation of this iconic scene. It’s a subject that allows for both structured learning of fundamental drawing principles and boundless artistic exploration.Mastering the Basics: Your First Campfire Drawing Steps
Every great drawing starts with a solid foundation. Learning how to draw a campfire effectively means understanding its core components before adding the fiery details. This section will guide you through the initial setup, ensuring your campfire has a believable structure.Gathering Your Essential Art Supplies
Before you begin your **campfire drawing**, gather your tools. You don't need an extensive art studio; simple supplies are often best for beginners. For a traditional approach, you'll want:- **Paper:** Any good quality drawing paper will do.
- **Pencils:** For sketching the initial shapes. A light H pencil for outlines and a darker B pencil for shading are ideal.
- **Eraser:** A kneaded eraser is excellent for lifting pencil marks without smudging.
- **Coloring Mediums:**
- **Oil Pastels:** As mentioned in the data, oil pastels in red, yellow, orange, and even some dark browns or blacks can create vibrant, blendable flames and rich logs.
- **Colored Pencils:** Excellent for adding fine details, layering colors, and achieving a realistic fire effect.
- **Markers:** For bold outlines or specific stylistic choices.
Laying the Foundation: Logs and Structure
The logs are the backbone of your campfire. They provide the structure and shape that the flames will emanate from. Follow these steps to sketch the basic shape and add details:- **Sketch the Basic Pile:** Start by lightly sketching a general mound shape where your logs will sit. Think of it as a loose pyramid or cone.
- **Draw the Logs:** Begin adding individual log shapes within this mound. Logs are rarely perfectly cylindrical; they often have knots, cracks, and irregular ends. Draw them crisscrossing or leaning against each other. Remember, the goal is to make them look natural and stacked for burning.
- **Define the Wood Grain:** Once the basic log shapes are in place, add details like wood grain lines, cracks, and the texture of bark. These small touches will make your logs look more realistic.
- **Consider the Ash Bed:** Below the logs, you might want to lightly sketch an area for ash or charred ground, indicating where previous fires have burned. This adds depth and context to your **campfire drawing**.
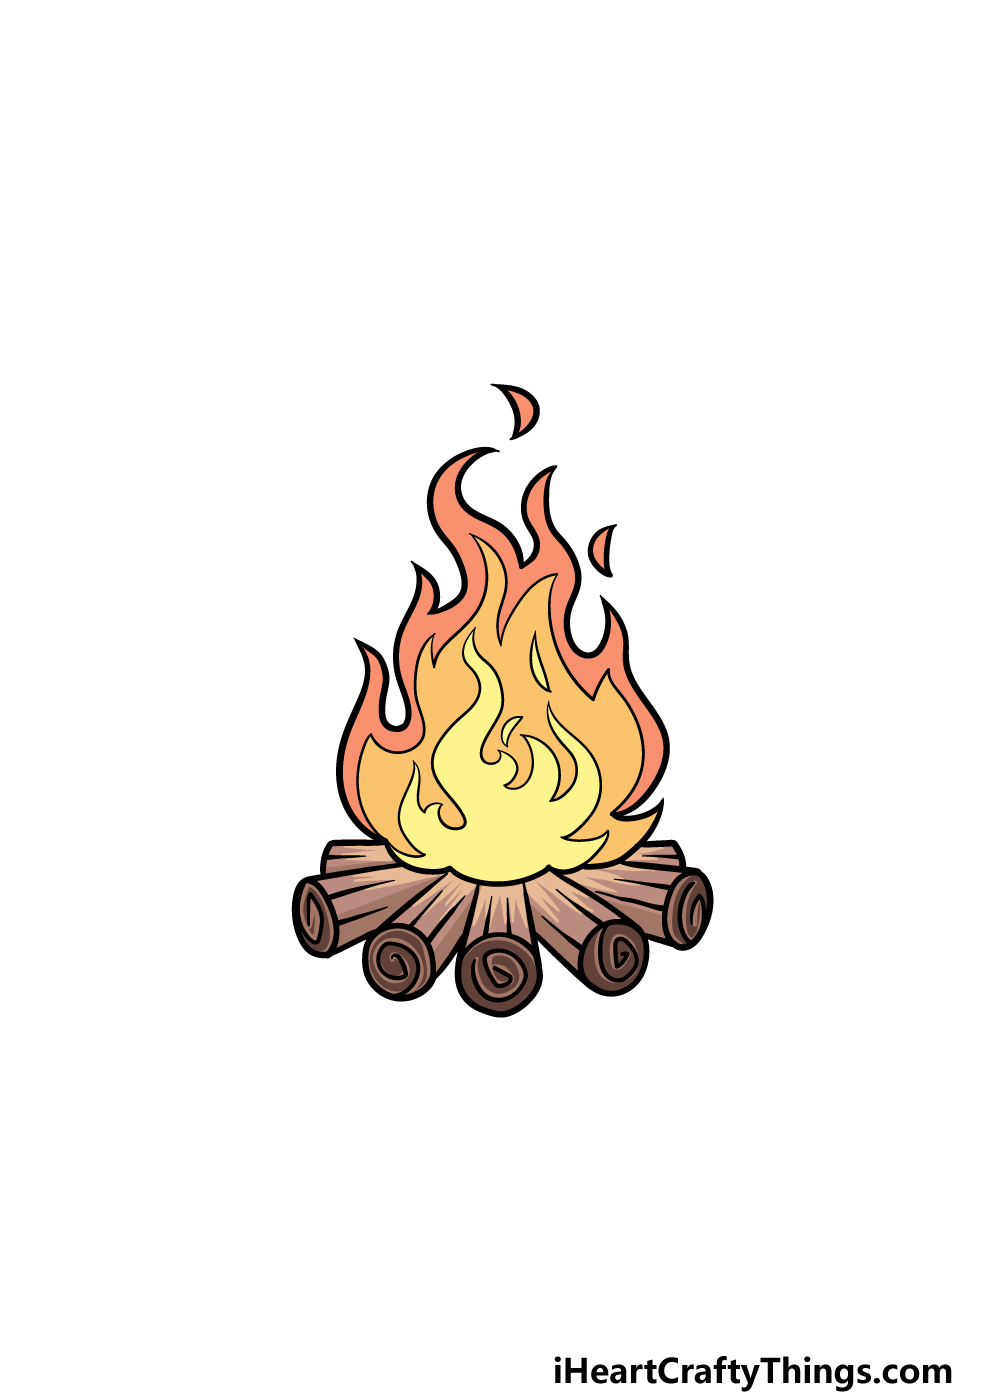
Igniting the Canvas: Drawing Realistic Flames and Embers
Now comes the most exciting part: bringing the fire to life! Drawing realistic fire or flames with colored pencils or oil pastels involves understanding the dynamic nature of fire and how light behaves.- **Basic Flame Shapes:** Start by sketching the general outline of the flames rising from the logs. Fire isn't static; it flickers and dances. Use wavy, upward-moving lines. Remember the data's advice: "Two fires never look the same, so feel free to change this lesson." Embrace the organic nature of fire.
- **Layering Colors:** This is where the magic happens.
- **Core Heat:** Begin with your brightest yellows and even some light oranges at the very base of the flames, where the fire is hottest.
- **Mid-Flames:** As you move upwards and outwards, introduce more orange and red. Layer these colors, allowing them to blend slightly.
- **Outer Edges & Smoke:** For the cooler, outer edges of the flames, you might introduce darker reds, hints of purple, or even a touch of dark blue (especially if you're aiming for a very hot, almost gas-like flame). Lightly sketch some wisps of smoke curling upwards from the top of the flames.
- **Adding Embers and Sparks:** Don't forget the glowing embers within and around the logs. Use small dots or dashes of bright orange and yellow. You can also add tiny, upward-flickering sparks for added realism, especially if using colored pencils.
- **Highlighting the Glow:** The fire emits light, so consider how it illuminates the logs and the surrounding ground. The parts of the logs closest to the flames will be brighter and warmer in tone.
The Art of Light and Shadow: Bringing Your Campfire to Life
Light and shadow are fundamental to making any drawing appear three-dimensional and realistic. For a **campfire drawing**, mastering these elements is crucial to capturing the "beauty and warmth of firelight on paper." The light from a campfire is unique: it's warm, flickering, and casts long, dynamic shadows.- **Identify Light Source:** The fire itself is your primary light source. Everything around it will be illuminated by its glow.
- **Warm Highlights:** The areas of the logs directly hit by the firelight will have warm highlights. Use lighter, warmer tones (yellows, oranges, light browns) on these surfaces.
- **Casting Shadows:** Objects around the campfire, including the logs themselves, will cast shadows away from the light source. These shadows will be darker and cooler in tone. Think about the direction of the light and how it would fall on the ground and any surrounding elements.
- **Ambient Glow:** The fire doesn't just create direct light; it also creates an ambient glow in the surrounding area. Lightly tint the immediate surroundings with warm, subtle colors to reflect this.
- **Flickering Effect:** Since fire flickers, the shadows it casts will also appear to move. While you can't animate your drawing, you can suggest this by making the edges of your shadows slightly softer or less defined, implying movement.
Beyond the Blaze: Enhancing Your Campfire Scene
A **campfire drawing** can be a standalone piece, but often, its magic is amplified by the surrounding environment and elements. Adding context and narrative can transform a simple drawing into a captivating scene.Adding Narrative: People, Marshmallows, and Tents
To make your **campfire drawing** more engaging and relatable, consider adding elements that tell a story. The data suggests, "Also be sure to add people roasting marshmallows and even a tent." This is an excellent way to introduce human presence and activity:- **People:** Sketch figures gathered around the fire, perhaps with their backs to the viewer, facing the warmth. Their faces might be softly illuminated by the firelight.
- **Marshmallows:** Small details like marshmallows on sticks or s'mores ingredients add a touch of authenticity and fun. Campfires are absolutely amazing to sit in front of, cook marshmallows with, and even s’mores.
- **Tents:** A tent in the background immediately establishes a camping scene, providing context and a sense of adventure.
- **Other Elements:** Consider adding rocks, fallen leaves, or even a guitar to further enrich the narrative.
Exploring Different Styles and Artistic Techniques
The world of art is vast, and there are countless ways to approach a **campfire drawing**. Don't feel limited to a single realistic style. "Explore alternative techniques, worksheets, and faqs to enhance your artistic skills and creativity."- **Cartoon/Stylized:** Simplify shapes, use bold outlines, and vibrant, flat colors for a more playful look. This is a great lesson to encourage your little artists to have fun and use their creativity.
- **Impressionistic:** Focus on capturing the feeling and movement of the fire through loose brushstrokes or smudged pastels, rather than precise detail.
- **Minimalist:** Use only a few lines and colors to suggest the campfire, relying on negative space and suggestion.
- **Digital Art:** If you're working digitally, experiment with different brushes for flames, glow effects, and blending modes.
Digital Campfires: Vector and PNG Resources
In today's digital age, the concept of a **campfire drawing** extends beyond traditional paper and pencils. Digital artists, graphic designers, and content creators often search for pre-made assets to incorporate into their projects. "Are you searching for camp fire drawing png hd images or vector?" The answer is often yes!- **PNG Images:** These are great for adding transparent campfire elements to digital collages, presentations, or web designs. They often come in various styles, from realistic to stylized.
- **Vector Graphics (EPS, AI, PSD):** Vector files are scalable without loss of quality, making them perfect for logos, illustrations, or any design that might need to be resized. They offer flexibility for customization.
Nurturing Creativity: Campfire Drawing for All Ages
Drawing a campfire is not just for experienced artists; it's a fantastic activity for beginners and children alike. "This is a great lesson to encourage your little artists to have fun and use their creativity." The subject matter is inherently engaging, and the forgiving nature of drawing fire allows for a lot of experimentation without fear of "getting it wrong."- **Simplicity for Beginners:** For those just starting, focus on the basic shapes and primary colors. Don't worry about perfect realism. The goal is to build confidence and enjoy the process. "Easy, simple follow along drawing lessons for beginners" are widely available and highly beneficial.
- **Encouraging Expression:** Remind learners that "Two fires never look the same, so feel free to change this lesson." This empowers them to personalize their artwork and prevents them from feeling constrained by strict rules.
- **Therapeutic Benefits:** The act of drawing, especially a comforting scene like a campfire, can be incredibly relaxing and meditative. It's a wonderful way to de-stress and engage in a mindful activity.
- **Educational Value:** Discussing the properties of fire (light, heat, smoke) while drawing can also be an educational experience. "When fires burn out of control, they can be very scary. But contained fires like this one are useful and even charming." This provides a gentle lesson on safety and the dual nature of fire.
Frequently Asked Questions About Campfire Drawing
"Explore alternative techniques, worksheets, and faqs to enhance your artistic skills and creativity." Here are some common questions artists have when approaching a campfire drawing: **Q1: What colors are best for drawing realistic fire?** A1: Start with bright yellows and light oranges at the hottest core of the flame. Blend outwards with darker oranges, reds, and even hints of dark purple or blue for the cooler outer edges. Don't forget to add white or very light yellow for the brightest highlights. **Q2: How do I make the flames look like they're moving?** A2: Use fluid, wavy lines for the flame shapes. Vary the height and width of individual flame tongues. Use soft blending between colors to create a seamless, flowing appearance, and consider subtle smudging to suggest motion. **Q3: Is it hard to draw fire?** A3: "Fire is not hard to draw." It might seem intimidating due to its dynamic nature, but by breaking it down into basic shapes, layering colors, and focusing on light and shadow, it becomes much more manageable and enjoyable. **Q4: What's the best way to draw the smoke?** A4: Smoke is often translucent and wispy. Use very light gray or even a faint blue, drawing soft, swirling lines that dissipate as they rise. Avoid harsh outlines for smoke. **Q5: How can I add a sense of warmth to my drawing?** A5: Use warm colors (reds, oranges, yellows) not just in the fire but also in the areas immediately surrounding it. Apply subtle warm tones to the logs, ground, and any nearby objects to show the fire's radiant heat. Soft, diffused lighting around the fire also contributes to a warm ambiance.Conclusion
From the initial sketch of the logs to the final touches of flickering flames and dancing shadows, creating a **campfire drawing** is a deeply satisfying artistic endeavor. We've explored how to capture the very essence of firelight on paper, discussed the essential art supplies, and delved into techniques for making your flames appear realistic and vibrant. We also touched upon enhancing your scene with narrative elements like people and tents, and even ventured into the world of digital resources for your creative projects. Remember, the beauty of a campfire, whether real or drawn, lies in its unique and ever-changing nature. Don't be afraid to experiment, explore different styles, and infuse your own creativity into every stroke. As you continue to practice, you'll find your own rhythm and develop a distinctive approach to this captivating subject. Now, it's your turn! Pick up your pencils and pastels, and let your imagination ignite. We'd love to see your creations and hear about your artistic journey. Share your **campfire drawing** in the comments below, or tell us about your favorite technique for drawing fire. And if you found this guide helpful, consider sharing it with fellow art enthusiasts! For more drawing tutorials and artistic inspiration, be sure to explore our other articles.- Miu Shiromine
- Desi Punjabi Mms
- Peter Ellis Kings Guard
- Aine Hardy Net Worth
- Is Frankie Katafias Still Working At Kiro 7 The Inside Scoop Yoursquove Been Waiting For

Premium Vector | Hand drawn camping bonfire vector illustration of fire
Campfire Illustration

Realistic Campfire Drawing
