Mastering The Balloon Knot: Your Ultimate Guide To Perfect Party Decor
Do you need to learn how to tie a balloon knot for your next celebration or event? Tying balloons can be tricky, especially if you’re working with a lot of them for a party or event, leading to frustration and sore fingers. But imagine a world where every balloon you inflate is perfectly secured, contributing to a stunning display rather than deflating prematurely.
Knowing how to tie balloons properly is an essential skill, whether it’s a birthday party, wedding, or corporate event. Balloons are versatile and colorful decorations that add a festive touch to any occasion. This article will guide you through the easy steps of tying balloons, provide alternative methods, share tips and tricks, and explore techniques that will help you build towards making your own displays, garlands, and arches!
Table of Contents
- Why Mastering the Balloon Knot is Essential
- The Basic Balloon Knot: A Foundation for Every Decorator
- Beyond the Basics: Alternative Balloon Tying Methods
- Tools of the Trade: Making Tying Easier
- Unknotting Balloons: When Things Go Wrong
- Creative Knot Techniques for Balloon Artistry
- Expert Insights: Tying for Large-Scale Projects
- Ensuring Longevity: Why a Good Knot Matters
Why Mastering the Balloon Knot is Essential
In the world of party planning and event decoration, balloons are often the star. From vibrant arches to whimsical garlands, their visual impact is undeniable. However, the beauty of these decorations hinges entirely on one crucial, yet often overlooked, skill: the ability to tie a secure balloon knot. Without this fundamental knowledge, your efforts can quickly deflate, quite literally. Imagine spending hours inflating dozens of balloons, only to find them slowly losing air because the knots weren't tight enough. This not only wastes your precious time and effort but also valuable resources like helium, which can be costly. The frustration of seeing your beautiful balloon display wilt before the event even begins is a common lament among amateur decorators.
- Exploring The Fascinating World Of Yololary Spiderman
- King Von Autopsy
- Gia Duddy Leaked Video
- Madison Beer Leak
- Is Frankie Katafias Still Working At Kiro 7 The Inside Scoop Yoursquove Been Waiting For
Learning how to tie a balloon knot the easy way can save yourself frustration and sore fingers by following our simple image tutorial. The basic balloon knot is a technique everyone should know, and once you master it, tying birthday balloons will be a breeze. It's not just about aesthetics; a well-tied knot ensures the longevity of your decorations, preventing helium or air from escaping prematurely. This is particularly important for helium balloons, as helium is a liquid gas that tends to seep even through microscopic holes. Therefore, after inflating the balloon, it is important to know how to tie a knot in a balloon so that the filler does not leave the balloon. This foundational skill empowers you to create stunning, long-lasting displays that truly impress, turning potential headaches into effortless triumphs.
The Basic Balloon Knot: A Foundation for Every Decorator
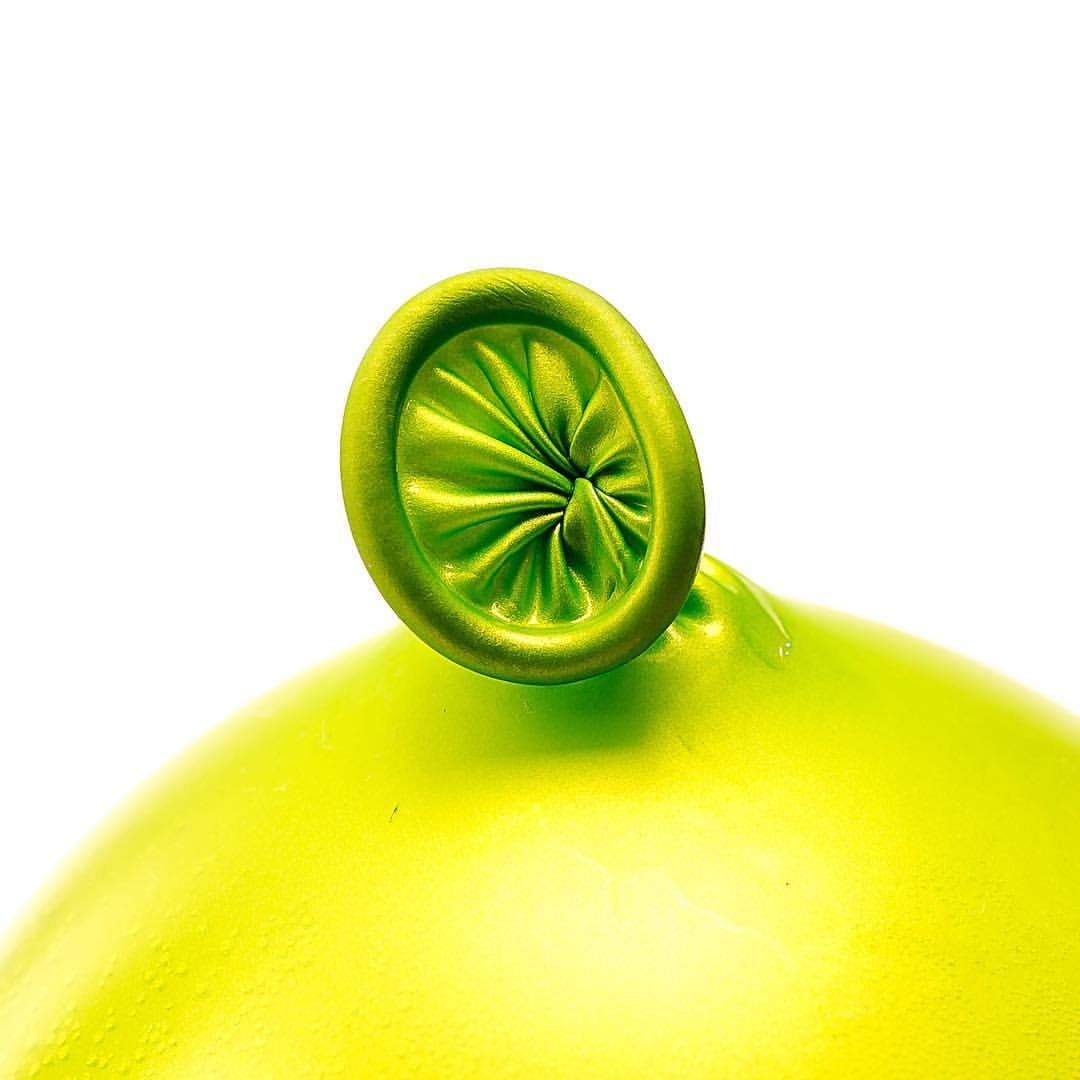
The traditional knot is the most common way to tie a balloon. Tying a balloon with a basic knot is the most common and straightforward method. This fundamental technique is the cornerstone of all balloon decorating, allowing you to secure individual balloons efficiently. Once mastered, it opens the door to more complex arrangements like arches and columns. Here’s how to do it, with simple steps to tie a balloon using a basic knot:
Step-by-Step Guide to the Traditional Knot
- Inflate the Balloon: Start by inflating the balloon to your desired size using an air pump or helium tank. However, be careful not to overinflate the balloon, as this can make it difficult to tie and prone to popping.
- Grip the Neck: Hold the neck of the balloon tightly with your non-dominant hand, typically between your thumb and forefinger, to prevent the air from escaping.
- Create a Loop: With your dominant hand, stretch the neck of the balloon away from the main body. Then, loop the neck of the balloon around your index and middle fingers. The neck of the balloon should now form a loop.
- Thread the Neck: Slip the end of the balloon's neck through the loop you've created around your fingers.
- Tighten the Knot: Finally, slowly release the grip on the balloon's neck, allowing the loop to slide forward off your fingers. This motion tightens the knot you've created and secures the balloon. You now have an inflated balloon that’s securely tied.
This easy tutorial will help you build towards making your own displays, garlands, and arches! The basic balloon knot is your first step towards becoming a balloon decorating pro.
- Donna Dixon
- Peter Ellis Kings Guard
- Trendgasmoverdrive9clothoff Io
- Caitlin Clark Shower
- John Mcphee Shrek
Tips for a Secure Basic Knot
- Don't Overinflate: As mentioned, overinflating makes the rubber taut and difficult to manipulate, leading to weaker knots or even bursts. Leave a small, uninflated "tail" at the neck if possible.
- Stretch the Neck: Before tying, give the balloon neck a gentle stretch. This makes the rubber more pliable and easier to loop and pull tight.
- Moisten Fingers (Optional): For very sticky or dry balloon necks, a tiny bit of moisture on your fingers can help the rubber slide more easily, allowing for a tighter pull.
- Practice Makes Perfect: The more you practice, the faster and more efficient you'll become. Learn how to tie a balloon with this easy tutorial, and soon you'll be knotting balloons in seconds.
Beyond the Basics: Alternative Balloon Tying Methods
While the traditional balloon knot is indispensable, there are other techniques that cater to different needs, especially when you're aiming for more elaborate designs or working with multiple balloons. These methods can offer increased security, a cleaner look, or simply make the process more efficient for specific projects.
The Half Hitch Knot for Elaborate Designs
The half hitch knot is a versatile and secure knot that’s perfect for more elaborate balloon decorations. This knot is similar to the bunny ear knot, but it creates a more compact and streamlined look, which can be advantageous when you want to minimize the visible knot or create a tighter cluster of balloons. Here’s how to perform it:
- Hold Balloon and String: Hold the balloon and the string in one hand, with the balloon facing towards you.
- Make a Loop: With the string, make a loop, keeping your hand inside the loop.
- Wrap and Pull: Wrap the string around the balloon's neck and through the loop, then pull tight. This creates a strong, self-cinching knot that holds well, especially when attaching balloons to a line or other structures.
Innovative Techniques for Multi-Balloon Creations
When creating balloon garlands, arches, or columns, you often need to connect balloons without individual knots for each. This is where creative knotting techniques come into play:
- Balloon-to-Balloon Knotting: A second option is, after having the first balloon armed (meaning inflated and perhaps partially tied or held), take a second inflated balloon without tying it and make a balloon knot between both beaks (necks). This technique is also very easy to perform and you can intertwine as many balloons as you want, creating seamless clusters. You simply wrap the neck of one balloon around the neck of another, tying them together directly. This saves time and creates a more cohesive look than tying each balloon individually and then attaching them.
- Twist and Lock: For quick clusters, especially with air-filled balloons, you can twist the necks of two inflated balloons together several times. This creates a secure bond without needing a traditional knot, perfect for building quads or duplets for garlands.
These methods are crucial for professional balloon artists and enthusiasts alike, enabling them to construct complex and visually stunning displays with efficiency and durability.
Tools of the Trade: Making Tying Easier
Struggling to tie a balloon? While mastering the manual balloon knot is a valuable skill, there are several ingenious tools available that can significantly ease the process, especially when you're dealing with a large volume of balloons. These tools are designed to save your fingers from soreness and speed up your workflow, making balloon decorating less of a chore and more of a joy.
The first device we will look at is a balloon tying tool. It works by replacing your fingers when you wrap the balloon to tie a knot. These tools typically feature a prong or a hook that helps you manipulate the balloon's neck without putting direct strain on your fingers. Here’s how they generally work:
- Wrap Around the Tool: After inflating your balloon, wrap the inflated balloon's neck around the nose or prongs of the tool.
- Cross and Pull: Slip your fingers in the hole (or use the tool's mechanism), cross the balloon neck over, and pull it off to tie a knot. Some tools have a slot where you slip the neck through, center the neck of the balloon at a right angle beneath the knot me tool, and stretch it at the same time.
- Release: Slide the balloon straight off of the end of the nose to take it off the tool. Then, just pull the end of the balloon tight to tie the ribbon inside of the knot if you're adding one.
In this video, we’ll show you how to easily knot a balloon in seconds using such tools. These devices are particularly beneficial for those with arthritis, carpal tunnel syndrome, or simply anyone who plans to tie hundreds of balloons for a large event. They not only prevent discomfort but also ensure consistent knot tightness, contributing to the overall quality and longevity of your balloon creations.
Unknotting Balloons: When Things Go Wrong
Sometimes, despite your best efforts, you might need to untie a balloon. Perhaps you tied it too tightly, or you need to reuse a balloon for a different project, or you've simply made a mistake. While untying a balloon knot can be challenging due to the elastic nature of the material and the tightness of the knot, it's not impossible. Here are a few methods to help you out:
- Gentle Push and Pull: To untie a balloon, gently push and pull on the knot to loosen it. This method requires patience and a delicate touch. Try to identify the "working end" of the knot – the part that was pulled last to tighten it – and gently reverse the process.
- Using Your Teeth: You can also use your teeth to pull on one of the strands of the knot so it's easier to untie. Be very careful with this method to avoid biting through the balloon or injuring your teeth. It's often effective for stubborn knots where finger strength isn't enough.
- Tools for Assistance: If you're still struggling, try sliding the prong of a fork or a knitting needle under one of the strands of the knot. The thin, rigid object can help create a small gap, allowing you to loosen the knot enough to untie it with your fingers. Small crochet hooks or even a sturdy paperclip can also work.
Remember that some knots, especially those tied very tightly or on older, less elastic balloons, might be impossible to untie without damaging the balloon. In such cases, it might be more practical to simply discard the balloon and use a new one.
Creative Knot Techniques for Balloon Artistry
Now, let’s unleash your inner balloon artist with some creative knot techniques! These aren’t just about securing the balloon; they can also add unique visual effects and structural integrity to your designs. Moving beyond the basic secure knot allows for more dynamic and artistic expressions in your balloon work.
- The Spiral Twist Knot: To create a fun spiral effect, twist the balloon neck multiple times before tying the knot. This not only adds a decorative element but can also make the knot more secure by adding friction. It's particularly effective for long, thin balloons or when you want to create a textured look in a garland.
- Double Knot for Extra Security: For balloons that absolutely cannot afford to deflate, like those used in outdoor displays or long-term installations, a double knot provides an extra layer of security. After forming your initial basic knot, simply tie a second knot directly over the first one. This is especially recommended for helium-filled balloons to minimize seepage.
- Knotting for Specific Shapes: For balloon artists creating animal shapes or complex figures, the knot itself can be integrated into the design. For example, a knot might form an ear, a nose, or a joint in a balloon animal. This requires precision and an understanding of how the rubber will behave under tension.
- The "Hidden" Knot: Sometimes, you want the knot to be as inconspicuous as possible. This can be achieved by pulling the knot very tightly and then tucking it into a fold of the balloon or positioning it strategically behind other balloons in a cluster. When using a balloon tying tool, you can often achieve a very compact knot that is easier to hide.
These techniques elevate your balloon artistry, allowing you to not only secure your balloons but also to enhance their aesthetic appeal and functional design. Experimentation is key to discovering new ways to incorporate knots into your creative process.
Expert Insights: Tying for Large-Scale Projects
When transitioning from tying a few balloons for a small party to creating grand installations like balloon arches and columns, the scale of the task changes dramatically. The principles of a secure balloon knot remain paramount, but efficiency and strategic planning become equally important. Professional balloon artists have developed techniques and insights that streamline the process and ensure durability for large-scale endeavors.
How many balloons do you need? This is a common question, and the answer directly impacts your tying strategy. Ahzahdeh Neshat, a professional balloon artist, provides valuable guidance on this. She says that if you want to make a garland, “each foot is going to take about 6 to 8 balloons.” This means a 20-foot garland could require between 120 to 160 balloons, highlighting the sheer volume involved and the necessity of efficient tying methods.
For such projects, consistency in knotting is key. Every balloon knot needs to be equally secure to prevent premature deflation across the entire structure. This is where the use of balloon tying tools becomes almost indispensable, as they ensure uniform tension and speed. Additionally, professionals often pre-tie balloons in clusters (like duplets or quads) before assembling them into larger structures. This "batch processing" of knots significantly reduces assembly time on-site.
Furthermore, when building arches and columns, the way balloons are tied to a fishing line or a frame is critical. The half hitch knot, for instance, is often preferred for its strong grip on a string or base, ensuring that balloons stay in place even under stress. Understanding these expert-level applications of the basic balloon knot and its variations is what transforms a simple decoration into a breathtaking centerpiece, capable of withstanding the duration of any event.
Ensuring Longevity: Why a Good Knot Matters
The lifespan of your balloon decorations, particularly those filled with helium, hinges significantly on the quality of your balloon knot. As you know, helium is a liquid gas that tends to seep even through the microscopic hole of a balloon's material. This means that if your knot isn't perfectly sealed, helium will slowly but surely escape, leading to premature deflation and a disappointing display. Therefore, after inflating the balloon, it is important to know how to tie a knot in a balloon so that the filler does not leave the balloon.
A well-executed, tight knot acts as the primary barrier against this leakage. It compresses the rubber at the neck of the balloon, creating a seal that minimizes the microscopic pathways for gas to escape. Without a secure knot, all the effort and expense of inflating the balloons, especially with costly helium, can be wasted as they begin to sag and lose their buoyancy within hours, rather than days.
Beyond helium retention, a strong knot also contributes to the overall structural integrity of balloon arrangements. In garlands, arches, or columns, each balloon knot is a critical point of connection. A weak knot can lead to individual balloons detaching from the structure, causing gaps or even the collapse of the entire display. This is particularly important for outdoor events where wind and movement can put extra stress on the knots. Investing a few extra seconds to ensure each knot is tied correctly is a small effort that yields significant returns in terms of the longevity and visual impact of your balloon decorations, ensuring your celebration remains festive from start to finish.
Conclusion
Mastering the balloon knot is more than just a party trick; it's a fundamental skill that empowers you to create stunning, long-lasting balloon decorations for any occasion. From the basic balloon knot that forms the foundation of all your projects to advanced techniques for multi-balloon creations and the use of helpful tools, you now have a comprehensive guide to becoming a balloon-tying pro. We've explored how to save yourself frustration and sore fingers, ensure your helium-filled balloons stay afloat longer, and even how to untie those stubborn knots when needed.
Remember, practice makes perfect. The more you tie, the more intuitive the process will become. So, grab some balloons, put these techniques into action, and watch your decorating skills soar. Do you have a favorite balloon-tying tip or a challenging knot story? Share your experiences in the comments below! And if you found this guide helpful, don't forget to share it with fellow party planners and explore our other articles for more creative decoration ideas.
- Evgeniya Lvovna
- Johnny Argent
- Nna Netrebko Net Worth
- Aditi Mistry Nip Slip The Full Story Behind The Viral Moment
- Delicious And Personalized The Art Of Custom Udon Creations
Balloon knot.

balloon knot | polymorph

Balloon Knot meme | Balloon Knot (Slang) | Know Your Meme
