Mastering Jellyfish Drawing: A Deep Dive Into Underwater Art
Table of Contents
- Why Draw Jellyfish? The Allure of the Deep
- Essential Tools for Your Jellyfish Drawing Adventure
- Understanding Jellyfish Anatomy: The Key to Realistic Drawing
- Step-by-Step Jellyfish Drawing Tutorials for Every Skill Level
- Adding Personality and Flair to Your Jellyfish Art
- Mastering Color and Texture in Jellyfish Illustrations
- Overcoming Common Challenges in Jellyfish Drawing
- The Meditative Joy of Jellyfish Art
Why Draw Jellyfish? The Allure of the Deep
Jellyfish are among the most interesting animals in the ocean. Hundreds of species have been described, each with its own unique shape, size, and captivating movement. Despite having no brain, skeleton, or blood, they are living creatures that hunt, eat, and move with purpose, embodying a mysterious elegance. This makes them an incredibly appealing subject for artists. Their translucent bodies, flowing tentacles, and often mesmerizing bioluminescence offer a vast canvas for exploring light, shadow, and ethereal beauty. For many, the act of jellyfish drawing becomes a meditative practice. The fluid lines and organic shapes encourage a relaxed, expressive approach to art. Whether you're fascinated by marine biology or simply drawn to their otherworldly aesthetic, learning more about the jellyfish drawing process allows you to connect with the natural world in a unique and personal way. It's an opportunity to capture the beauty of the underwater world with a stunning jellyfish illustration drawing, letting your creativity flow as you bring this captivating creature to life on paper.Essential Tools for Your Jellyfish Drawing Adventure
Before you begin your jellyfish drawing journey, gathering a few basic supplies will set you up for success. You don't need an elaborate art studio; often, simplicity is key, especially when you're just starting. Here's what you'll typically need:- Pencils: A standard graphite pencil (HB or 2B is versatile) for sketching. If you want more variety, a harder pencil (2H) for light guidelines and a softer one (4B or 6B) for darker shading can be useful.
- Eraser: A good quality kneaded eraser or a plastic eraser will allow you to correct mistakes without damaging your paper.
- Paper: Any drawing paper will do, but a slightly heavier weight (around 80-100lb or 180-220gsm) will hold up better to erasing and layering.
- Black Marker or Fineliner (Optional): For outlining your jellyfish drawing once you're happy with the sketch. This can give your artwork a clean, finished look.
- Coloring Mediums (Optional): Colored pencils, watercolors, markers, or even digital tools if you prefer. We'll discuss adding color later, but having these ready allows for immediate experimentation.
- Reference Images: Look up real jellyfish photos online! Observing different species will inspire your designs and help you understand their unique forms.
Understanding Jellyfish Anatomy: The Key to Realistic Drawing
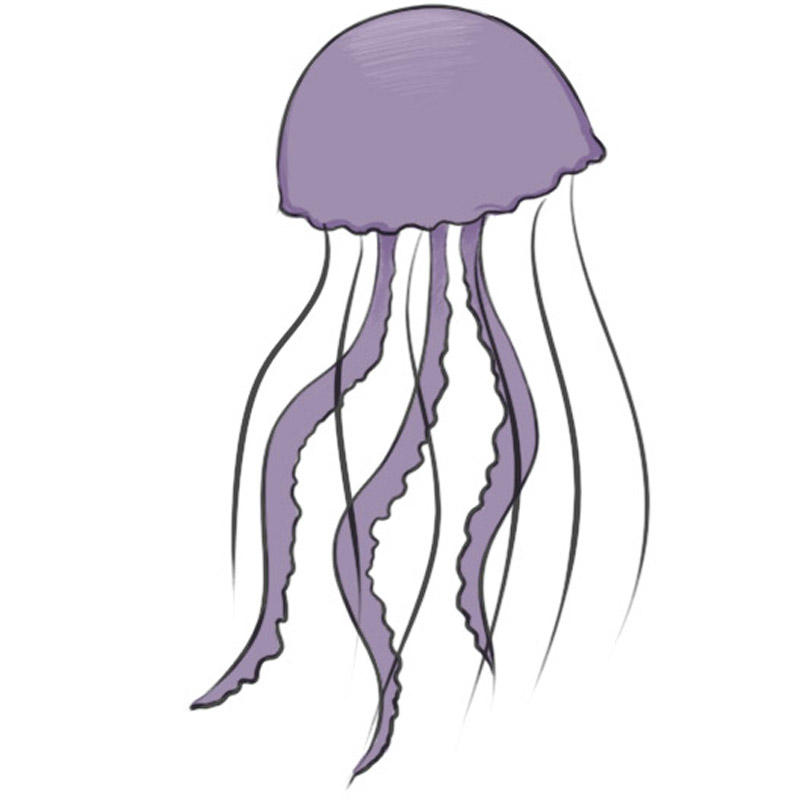
While jellyfish may seem simple, understanding their basic anatomy is crucial for creating a convincing jellyfish drawing, whether it's realistic or stylized. They consist primarily of two main parts: the bell and the tentacles/oral arms.Drawing the Bell: The Iconic "Head"
The bell is the main body of the jellyfish, often referred to as its "head." It's typically umbrella-shaped or dome-shaped. To create the head, also known as the bell of your jellyfish, sketch an oval shape that is flat at the bottom. This initial shape sets the foundation for your jellyfish drawing. Think about the specific species you're drawing. Some bells are very round, like a mushroom cap, while others might be flatter or more elongated. Then, on the bottom, in a curved shape, make a wavy line for the bottom edge of your jellyfish. This wavy line adds a natural, organic feel, suggesting the delicate, often frilly edge of the bell. Remember, the bell is often translucent, so you'll be thinking about how light passes through it, even at this early stage.Crafting the Tentacles and Oral Arms
Beneath the bell, jellyfish have tentacles and oral arms.- Tentacles: These are usually long, slender, and often numerous. They are used for stinging prey and can extend far beyond the bell. When drawing them, think about their flow and how they would move in water – they should appear graceful and somewhat unpredictable.
- Oral Arms: These are typically thicker and shorter than the tentacles, located around the mouth (which is usually underneath the bell). They are used to bring food to the mouth. They often have a frilly or ruffled appearance.
Adding Facial Features for Character and Charm
While real jellyfish don't have faces in the traditional sense, adding simple features can bring a charming, whimsical touch to your jellyfish drawing, especially if you're aiming for a cute and simple style. You can give your jellyfish eyes, a small smile, or even a blush. This is where you can truly have fun with coloring and details, letting your imagination guide you. For instance, Jack and I are learning how to draw a realistic jellyfish, but even in realistic styles, a subtle suggestion of life can enhance the piece. Olivia and I are learning how to draw a simple jellyfish, and this lesson is meant for younger artists, but it's fun for all ages!Step-by-Step Jellyfish Drawing Tutorials for Every Skill Level
Whether you're a complete novice or looking to refine your techniques, there's a jellyfish drawing tutorial for you. We'll show you how to draw a jellyfish in two different styles: a simple, cute version perfect for beginners, and a more advanced, realistic approach. In this drawing lesson, we’ll show you how to draw a jellyfish in easy steps, progressively building upon each previous step until you get to the final rendering of the jellyfish.Simple and Cute Jellyfish for Beginners and Younger Artists
This quick and fun art activity is perfect for beginners of all ages. Drawing has never been so easy!- Start with the Bell: Sketch a simple U-shape or an inverted bowl shape for the top of the bell.
- Add the Wavy Bottom: On the bottom of your U-shape, draw a wavy line to create the lower edge of the bell.
- Draw the Tentacles: From the wavy bottom, draw a few curved lines extending downwards. These will be your main tentacles. Make some longer, some shorter.
- Add Oral Arms (Optional): In the center, beneath the bell, draw a few shorter, frillier shapes for the oral arms.
- Give it a Face: For a cute jellyfish, add two simple dots for eyes and a small curved line for a smile.
- Color and Detail: Now, have fun with coloring and details! Use bright, cheerful colors. You can add small dots or patterns on the bell. Learn how to draw a cute and simple jellyfish with this free printable tutorial. Follow the easy steps to create the body, tentacles, and face of a jellyfish and have fun with coloring and details. Instructions on how to draw a simple jellyfish for kids are often found on sites like drawing123.com, which can show you how to draw a simple jellyfish.
Realistic and Detailed Jellyfish for Advanced Artists
For today's art, we're going to be showing you how to draw a beautiful, realistic jellyfish. This lesson is more advanced but still fun for everyone.- Light Sketch of the Bell: Begin with a very light sketch of the bell's overall shape. Think about its three-dimensional form – it's not flat. Consider the perspective; is it seen from below, above, or the side?
- Define the Bell's Edge: Carefully refine the wavy line at the bottom of the bell, adding subtle undulations and folds to suggest its delicate structure.
- Layer the Tentacles and Oral Arms: This is where realism comes in. Instead of just drawing lines, think about the volume of the tentacles. Draw multiple layers of varying thickness and length. Some tentacles might be almost transparent, while others are more defined. Use overlapping lines to create depth.
- Introduce Shading and Transparency: Jellyfish are largely translucent. Use very light shading and subtle gradients to suggest the form of the bell without making it opaque. Focus on the edges where the light catches or where the bell is slightly thicker. Follow the tips and tricks to create a realistic and unique jellyfish illustration with blue tones and textures.
- Add Texture and Details: Look at reference photos for subtle textures on the bell or within the tentacles. These could be small dots, internal structures, or very fine lines that suggest the flow of water around them.
- Refine with Highlights and Shadows: Use highlights to show where light hits the translucent bell and subtle shadows to define its curves and folds. This will make your jellyfish drawing appear more three-dimensional and lifelike.
Adding Personality and Flair to Your Jellyfish Art
Beyond just drawing the basic form, you can infuse your jellyfish drawing with unique personality and flair. This is where your creativity truly shines. From jellyfish with bows and glasses to jellyfish playing music and reading books, these drawings are perfect for a quick doodle or a more elaborate piece. Consider these ideas:- Accessories: Give your jellyfish a tiny hat, a monocle, or even a small backpack. These unexpected elements can add humor and charm.
- Expressions: Even without a traditional face, you can convey emotion through the tilt of the bell or the flow of the tentacles. A bell tilted slightly to the side can suggest curiosity, while flowing, upward tentacles might imply joy.
- Activities: Imagine your jellyfish engaged in an activity. Is it holding a tiny teacup? Floating near a sunken treasure chest? Interacting with other sea creatures? See more ideas about jellyfish, ocean creatures, sea creatures to spark your imagination.
- Backgrounds: A simple background can greatly enhance your jellyfish drawing. Consider bubbles, seaweed, coral, or even distant silhouettes of other marine life.
Mastering Color and Texture in Jellyfish Illustrations
Color and texture are paramount when creating a captivating jellyfish drawing, especially if you're aiming for realism. Jellyfish are known for their stunning translucence and often vibrant, yet subtle, coloration. When applying color:- Blue Tones and Textures: Many jellyfish exhibit beautiful blue tones, from deep indigos to light aquamarines. Experiment with layering different shades of blue, purple, and even hints of green to create depth and luminosity. Remember that light passes through them, so colors will be softer and more diffused than on opaque objects.
- Transparency: This is the trickiest but most rewarding aspect. Use light washes of watercolor or very light pressure with colored pencils to build up color gradually. Leave areas untouched or very lightly colored to suggest transparency. Consider what might be *behind* the jellyfish – the water, distant light – and allow hints of that to show through the bell.
- Bioluminescence: If you want to depict a glowing jellyfish, use lighter, brighter colors (whites, yellows, light blues) in the areas where light emanates. You can then add a soft glow or halo around these areas.
- Subtle Patterns: Some jellyfish bells have very fine, almost invisible patterns or ridges. You can suggest these with very light, delicate lines or stippling.
- Tentacle Flow: The texture of tentacles is their movement. Use varied line weights and slight irregularities to make them appear fluid and organic.
- Water Effects: Adding subtle ripples or light reflections in the surrounding water can enhance the overall texture and realism of your jellyfish drawing.
Overcoming Common Challenges in Jellyfish Drawing
Even with step-by-step instructions, you might encounter a few hurdles when learning how to draw a jellyfish. Don't get discouraged – these are common challenges that every artist faces! Here are some tips to overcome them:- Achieving Transparency: This is often the biggest challenge. Practice light layering with your chosen medium. For pencils, use very light pressure. For watercolors, use diluted washes. Think about negative space and what's *behind* the jellyfish. Sometimes, drawing the background elements first and then drawing the jellyfish *over* them (with transparency in mind) can help.
- Drawing Fluid Tentacles: Stiff or uniform tentacles can make your jellyfish look unnatural. Practice drawing long, flowing, curved lines with varying thickness. Don't be afraid to let them overlap and intertwine. Use your wrist and arm for smooth, sweeping motions, rather than just your fingers.
- Perspective and Depth: Making your jellyfish look three-dimensional requires understanding basic perspective. Think about which parts are closer (and thus appear larger or more defined) and which are further away (smaller, less defined, perhaps blurrier). Overlapping elements are key to creating depth.
- Proportion: Sometimes the bell might look too big or too small compared to the tentacles. Use light guidelines to establish the general size of each part before you commit to details. Reference images are invaluable here.
- Patience and Practice: As with any skill, consistent practice is vital. Don't expect perfection on your first try. Jack and I are learning how to draw a realistic jellyfish, and it takes time and effort. Every drawing is a learning experience.
The Meditative Joy of Jellyfish Art
The process of jellyfish drawing is more than just putting lines on paper; it's a journey into mindfulness and creative expression. The fluid, organic shapes and the focus required to capture their ethereal beauty can be incredibly calming and meditative. As you concentrate on the delicate curves of the bell and the graceful flow of the tentacles, you can find a sense of peace and focus. Whether you're creating a simple, cute jellyfish for a quick doodle or embarking on a detailed, realistic jellyfish illustration, the joy lies in the process itself. It's a chance to disconnect from daily stresses and immerse yourself in the delightful world of underwater art. We hope you and your kids really enjoy creating these captivating creatures. Let your creativity flow as you bring this captivating creature to life on paper. In conclusion, the world of jellyfish drawing is vast and rewarding. From understanding their unique anatomy to mastering transparency and adding personal touches, every step offers an opportunity for growth and artistic discovery. Remember to start with basic shapes, build up details gradually, and most importantly, have fun with the process. Your journey into jellyfish art is just beginning, and with practice, you'll be able to capture the mesmerizing beauty of these ocean wonders with confidence and skill. What kind of jellyfish will you draw first? Share your thoughts and creations in the comments below! If you enjoyed this guide, consider exploring our other drawing tutorials to continue your artistic adventure.- Kaitlan Collins Husband A Closer Look At Their Relationship
- Anna Malygon
- Mothers Warmth Chapter 3 Jackerman
- Necati Arabac%C3%84
- Melanie Joly Husband

Jellyfish, Original Handmade Drawing on Paper, Fine Line Artwork in

Jellyfish art, Watercolor jellyfish, Jellyfish painting
How to Draw a Jellyfish - Easy Drawing Art
